
Vue CLI is the fastest way to get your Vue project off the ground and it also comes with a really cool graphical user interface that allows you to easily modify your project’s configuration, run linters, search for and install plugins, analyse your bundle with webpack and more.
Table of contents
To install the Vue CLI globally run the following command:
npm install -g @vue/cli
# OR
yarn global add @vue/cli
To open the GUI run the following command and it will launch automatically on localhost:8000:
vue ui
Project Manager
Once you launch the UI you will be brought straight to the project manager if you haven’t already got any projects and to the project dashboard if you have. Let’s create a project so that we can see all the other cool things we can do with the UI.

Create a Project
You can create a project direct in the UI. First select where you want the project to be saved by clicking the required folder or the folder icon to choose a different destination. Then click on the create a new project here button and choose a name for your project.
You can then choose your preferred package manager or just leave the default one if you’re not bothered. Here you also get some additional options such as if to override the folder if it already exists and scaffolding the project without beginner instructions. And of course you can initialise a git repository which is recommended and you can add an optional commit message.
Then click on the next button and you can choose which preset you want to include such as eslint and babel or your own personal one.
Clicking on the manual one will give you a list of features to add including adding testing, router, pwa and much more. This is a great option if you know what you want in your project. If you select the router for example you can then click on the configuration option to configure it as you wish. For example with the router you can choose if to turn on history mode for the router and for eslint, which lint config you would like to use.
If you are not sure what you want in your project just choose the default preset which will give you babel and eslint and will be more than enough to get you started and you can of course always add more later. Then click create project and your project is created.
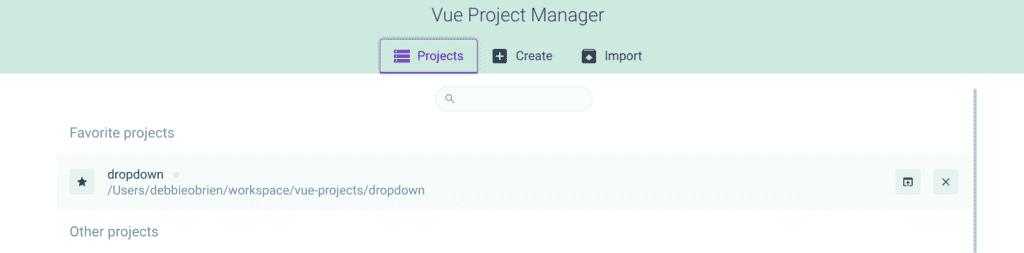
Importing your projects
If you have more projects already created you can import them by clicking on the import tab, find your project and click import and you will see your project is now in the UI.
Under the projects you will see all your projects that you have created and these are ordered by favourites being at the top and then other projects. Here you have the option to rename them, open them in the editor and remove them.

Free eBook
Directives, simple right? Wrong! On the outside they look simple, but even skilled Angular devs haven’t grasped every concept in this eBook.
-
 Observables and Async Pipe
 - Identity Checking and Performance
- Web Components <ng-template> syntax
- <ng-container> and Observable Composition
- Advanced Rendering Patterns
- Setters and Getters for Styles and Class Bindings
Ooops watch out as clicking the x to remove the project does not give you a warning and then your project is gone. But all is not lost, just click on the import tab, find your project and click import and then it is back again.
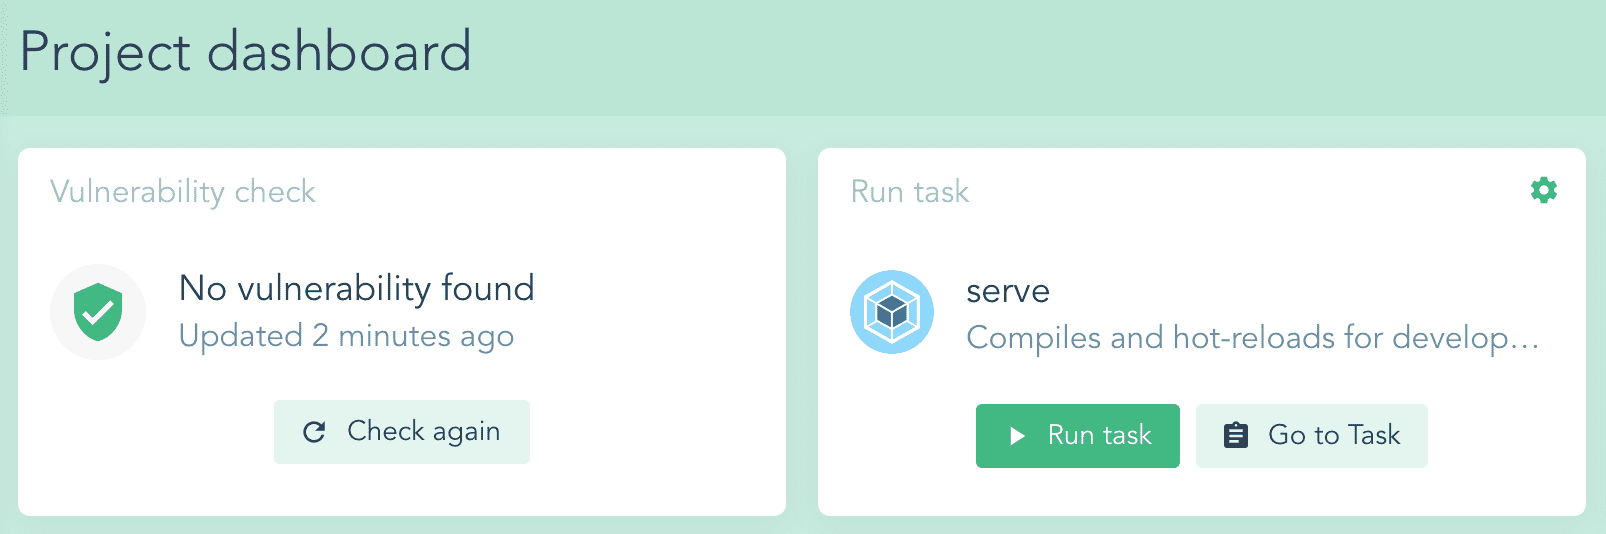
Project Dashboard
The project dashboard is fully customisable. There is a button at the top left that you can click and then you can drop the widgets you want into the dashboard. My favourite includes the run task widget. By adding this to the dashboard I can easily serve my project without having to click anywhere else. I also love the vulnerability check that is checking for my package vulnerabilities so that I don’t have to.
Ok, let’s take a walk through the sidebar and all the other cool features the UI gives us.
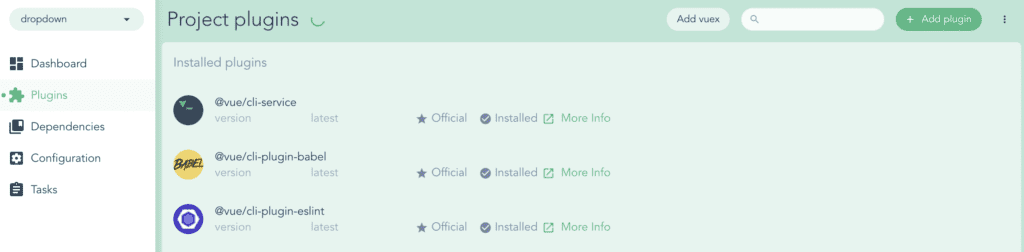
Plugins
Clicking plugins in the sidebar will show you what plugins are already added to your project. To add more plugins just click the add plugin which will open up a search field so you can search for the plugin you want. There are a lot of plugins so just search for the one you want and once you have clicked on it, a button will appear at the bottom so that you can install it.
Once everything has been installed the UI will show you what files have been changed and you can choose to commit your changes or skip to do it later. You will then see your installed plugin. There is no way to delete your plugins from the UI, this will have to be done using your editor. You will also note 3 dots beside the add plugin button. This is a great feature that allows you to update all plugins at once.
Dependencies
Clicking on dependencies in the sidebar will show you want dependencies you have installed. This is split into main and development. The main dependencies are what is needed to build your app and the development dependencies are needed only in development, for example, linters and loaders. You can add a new dependency by clicking the install dependency button.
Then you can choose if you want to install a main or development dependency. Use the search field to search for the dependency you want, select it, and then click on the install button. You will now see your newly installed dependency. If you want to delete it, all you have to do is click the trash can icon and then confirm by clicking the uninstall button. Just like with the plugins, you will see the 3 dots next to the install dependency button which allows you to update all dependencies at once.
Configuration
Clicking on the configuration in the sidebar will show you your project’s configuration, which allows you to configure certain plugins. Let’s check out the Vue CLI one. Most of this you will not, and probably should not, configure but if you need to, or want to you can. You can modify the public path, change the name of the dist folder and other options such as disabling the css source maps or enabling css modules plus a few more options.
Eslint configuration lets you turn off lint on save and you can select a different config to be even more stricter with your linting. And if you click on the rules tab you will see all the linting options and you can turn off individual rules or make them warnings instead of errors. There is also a more info link that will take you to the eslint docs where you can read up more on what that lint rule does.
Tasks
The tasks is my favourite part of the UI. This is where you get to use webpack to serve build and inspect your project.
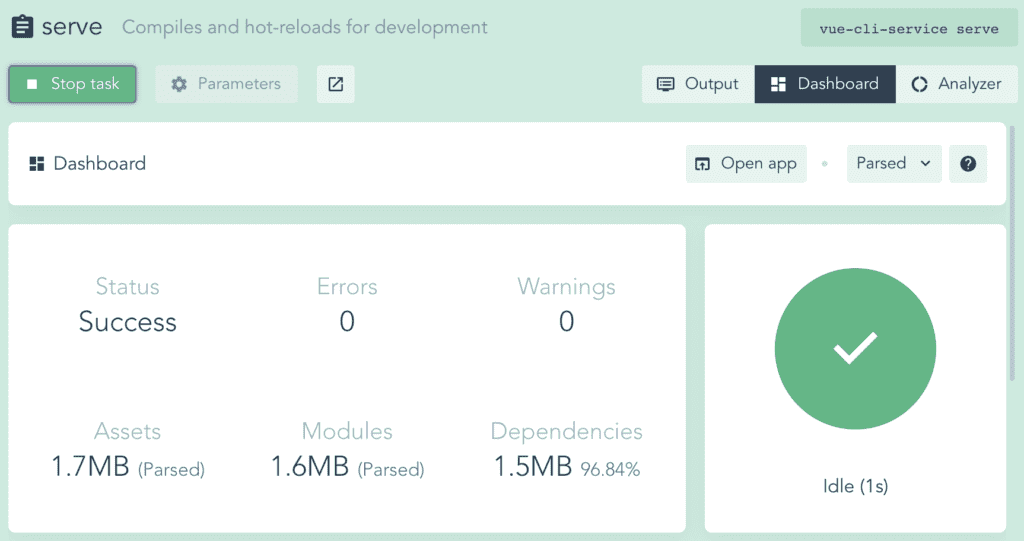
Serve
The serve command compiles and hot loads your project for development. If you click on the run task it will compile your project for you and it will show you the status of your project, if it has any errors and warnings and the size of your assets, modules and dependencies. It also gives you some great speed stats of how long it takes for your app to run.
You can analyse your app even further by clicking on output which will give you some more information on your app including where the app is running.
You can also click the analyzer button which will graphically show you how big your app is and if you hover over it you can see exactly which packages are taking up the most KBs.
Once you have ran the serve task and the circle on the dashboard option is in green, which means everything is ok, you can click the open app button which will open your app in a new tab.
Build
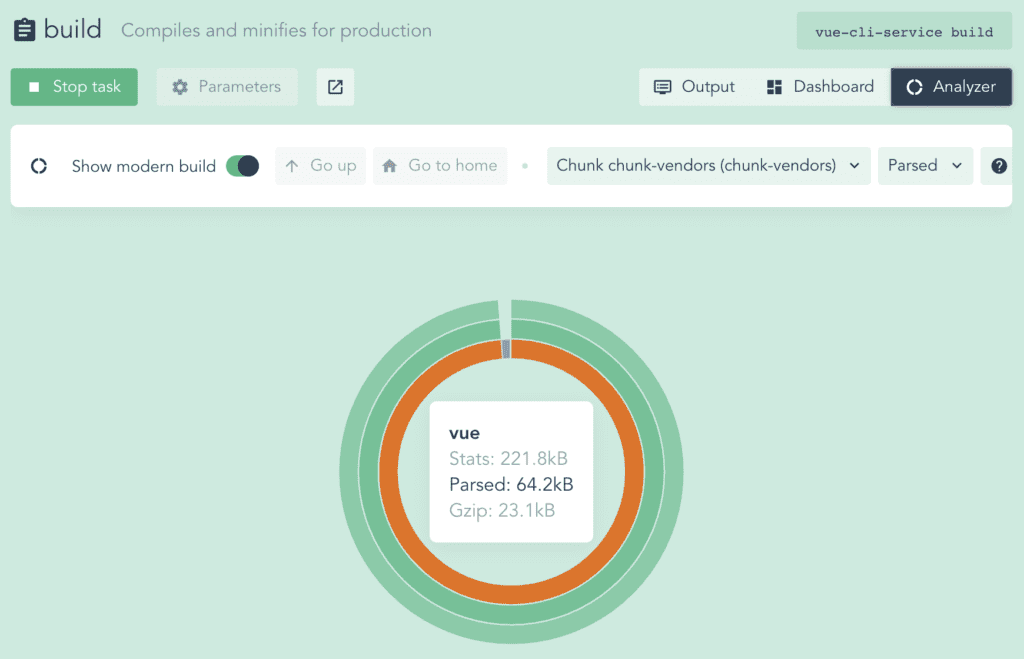
The build command is very similar to the serve command except for that it creates a production build for you. By clicking on the run task you will see that your build is a lot lighter and the speed stats are a lot higher. That is because we are building for production so everything is minified and we only include the packages that are needed to make your app work. You will also see that there is a great feature called show modern build and if you select it, it will create a modern build for you which is much smaller.
You can see this better if we click on the analyzer option. Switching modern mode on and off you can see that not only is it smaller but certain packages are not included. This option basically creates a modern build for those browsers that support ES6 modules but it also creates another bundle for legacy browsers that do not support ES6 modules and need polyfills. The correct bundle is then served to the correct browser.
Lint
Here you can run the lint task and if everything is ok it will tell you No lint errors found! however if there are errors it will show you here what error it is and where to find that error so that you can fix it. You will also see a parameters option where you can configure options such as not auto fixing the lint errors.
Inspect
The inspect task lets you inspect the webpack config. Generally you won’t need to view or modify this but if you do or you are interested in what is going on under the hood then running this task will give you all the info you need on what webpack is doing for you. And you even get to choose some parameters such as specifying an env mode.
Tips
Clicking on the more option will open up the project manager. You can also get to Project Manager by clicking on the home icon at the bottom of the sidebar or by clicking on your project’s name at the top of the sidebar which will open a dropdown menu with more options including renaming your project, favourites, recent project and the option to open your project in your editor.
At the very bottom of the UI you will see a home icon. This is a shorter way of accessing the project manager dashboard. You will also see the route of where your project is. Clicking the info button will open up the Vue CLI project logs. The rain drop icon lets you toggle between light and dark mode. The bug icon opens the issue helper, where you can report a bug or request a feature. There is also a link where you can help to translate the api and and a refresh icon to refresh the plugins api.
By now you should feel really comfortable moving around the Vue UI. It’s a great tool to use and a great way of managing all your Vue projects or easily creating new ones without the need to open a terminal. I hope you have lots of fun with the Vue CLI and UI and look forward to hearing about the great projects you have created with it.

